
[ECG] Deck Check: Dauntless' Dominating Drive!

Kagero had recently been brought back to the limelight with the induction of Transcendence Dragon, Dragonic Nouvelle Vague, the almighty grade 4 who has been terrorizing the competitive scene for as long as he can remember, but that didn't necessarily mark the end of their support. Link Joker's spread of Reverse has shown no sign of stopping, and it has finally reached the legendary Flame Dragons!
.jpg)
Instead of coming with a flashy skill that turns the tide of the battle immediately, Dauntless Dominate comes with a skill that mitigates the downsides of revealing any non-trigger in your drive check and turning it into advantage, as well as power. Most of the time you'll be picking off the back row with this skill, making it harder for your opponent to hit your 13000 defensive vanguard.
Guarding Dauntless Dominate's strikes is quite different than most other popular vanguards, since no matter what it's going to be gaining power from each trigger check. In the worst case, you're drive checking two non-triggers, meaning your Dauntless gains +6000 additional power. In the best case, you're getting two triggers, so Dauntless gains +10000 power. In the middle you have both a trigger and a non-trigger, resulting in a +8000 boost. If your Dauntless Dominate is going into the trigger check with 20000 power from its Cross Ride defense and a 7000 booster, this means that your minimum power is 26000 and your maximum power is 30000. As a result, any 11000 base needs to drop 20000 in shield to block the attack, no matter the result.

What makes Dauntless Dominate so much better is its synergy with his former self, Dauntless Drive Dragon. While decks in the past attempted to use Dauntless Drive to make it easier to resolve on-hit skills, Dauntless Dominate converts the extra attack into the pure value, since you have four drive checks in a single turn, giving you the potential to retire up to four grade 1's. In this case, you're either ripping a LOT of triggers to slingshot you ahead in the game, or you're just retiring off your opponent's back row, so it's a win-win situation almost all of the time.
Dauntless' Dominating Drive!
17 / 14 / 11 / 8
3 Lizard Soldier, Goraha [Critical]
3 Seal Dragon, Biella [Critical]
3 Seal Dragon, Artpique [Draw]
3 Gattling Claw Dragon [Draw]
4 Dragon Dancer, Barbara [Heal]
Mitigating the Lock
.jpg)
This also makes it important to conserve your extra grade 3's, since those also make good candidates for un-boosted attacks. However, when you don't have access to either, Diable Drive Dragon shines by being able to throw a punch at just about any front row rear-guard. Even if he can't go after their vanguard, you can attempt to further reduce your opponent's resources and make it hard to actually build proper columns. Diable Drive Dragon is also an ideal vanguard booster with his default 7000 power.
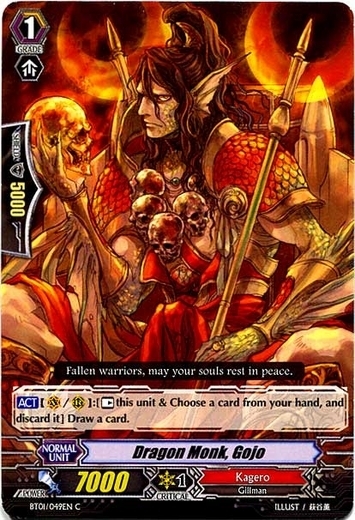
Gojo also fills a role where you need a unit like him to dig into your deck to put together your two grade 3's for the late game. Drawing cards is really important for a deck like this, because if you sit on a Dauntless Drive Dragon for too long, your opponent can take advantage and commit more towards the game, pushing you behind to make it hard to come back when you finally draw Dauntless Dominate.
What puts Gojo above a lot of other draw power units is his ability to be used more than once per turn. Sure, he might not be able to boost during this time, but putting together both of your Dauntless Dragons is more important than ever. There are also cases where you don't have to use Gojo's skill, making him a perfectly valid 7000 booster. It is because of this duality that he's so key to the deck.
All Along the Calamity Tower

You may think that it's difficult to resolve multiple Wyverns, as Kagero don't focus heavily on soul, but the truth it that Kagero's trigger line-up has been able to sustain soul for a decent amount of time.

The other example is Seal Dragon, Artpique, who can simply add himself to the soul to give any Kagero +3000 power. There are some cases where you can use Artpique to ramp a column over 21000 or enable Dauntless Dominate to force out even more cards, so while it's not as good as Gattling Claw Dragon, it still fits in niche situations that can put you ahead.

Ideally, on your grade 2 turn, you want to ride Bellicosity Dragon, use Dracokid to search for a grade 3, then use Calamity Tower to draw a card. Then, if you pair Bellicosity with a 7000 booster, you'll set up Dauntless Dominate Dragon while also attempting to free up the damage you spent for Dracokid. Usually this attack will land since it's early in the game and Bellicosity has a total power of 16000, which makes the setup so good.
Berserk and Bellicosity
.jpg)
Bellicosity also helps you make room for some of the other counterblasts in the deck, like Red Pulse Dracokid and Berserk Dragon, for example, and there's no downside to using him. There aren't any other grade 2 9000 units that come with as much value as him for the deck and he still carries an average amount of power to be a good standalone grade 2.

If you don't use him, once again, he's still a solid 9000 power grade 2 who makes solid columns with the 7000 power boosters that your deck comes with. He's still pretty situational when actually creating value, but again, Kagero don't have that many better options at the moment.
If you really don't want to include Berserk Dragon in your deck, I'd recommend playing 10000 grade 2's like Dragon Knight Nehalem, but they're not much of an improvement. There's no 6000 boosters that need 10000 attackers to be relevant, and you usually want to ride a Bellicosity Dragon anyway to work with your Red Pulse Dracokid.
General Strategy

Dauntless Dominate Dragon succeeds in a long, drawn out game due to the low cost of his Limit Break. Since you can use his skill almost every turn, you want to keep the game going on as long as possible, as in most match-ups you'll eventually crawl ahead. If you play versus a burst strategy, surviving the initial burst should make the rest of the game extremely easy to play out, since Dauntless Dominate can grind out and crawl back to a winning position.
.jpg)
In this case, you want to chain your original Dauntless Drive Dragons as often as possible, as this helps you create an offensive versus Link Joker's control and also gives you a strategy that doesn't involve you locking your field for your opponent to benefit off of. Regardless, it's a difficult match-up to win because it's hard to take advantage of what your deck naturally does. However, if you can abuse your Break Ride skill and 13000 defense successfully, it's still a winnable match-up.
Standing up to the Transcendence Dragon
.jpg)
I wouldn't say that this makes Dauntless Dominate the better deck, but it makes Dauntless Dominate a more valid pick than before. One thing that Dauntless Dominate offers is that it's a much safer deck to pilot, since it doesn't have to ride four times to win. While it's really good to find both of the grade 3's you need, you don't automatically lose when you find Dauntless Dominate before Dauntless Drive, which can be the case in Nouvelle Vague if you don't see Nouvelleroman Dragon.
In the end, it should always be up to the individual player to decide which deck is stronger. Nouvelle Vague's attacks can hit extremely hard, but Dauntless Dominate turns your drive checks into massive advantage swings. Both decks have their pros and cons, but it's up to you to decide what you play!
Thanks for reading this edition of Deck Check. It's a bit late due to Booster Set 14 coming out last month, but it's still a good deck to look over, especially since it has potential to do well in the metagame. As always, comments and questions go below, and once again, thanks for reading.


0 comments:
Post a Comment